
The cookies are cooled, the cupcakes are ready to frost and the brownies are cut. Now you can make a tray of different treats look like they belong together, without several frosting colors or a drawer of piping tips.
Pick one sprinkle palette, give each treat a surface the sprinkles can grip and repeat a few simple patterns across the tray. The steps below cover choosing a mix, attaching it to different surfaces, decorating each treat and packing everything without smudging the finish.
Key Takeaways
- One sprinkle palette helps cookies, cupcakes, brownies and bark look like a matching set.
- Sprinkles need a tacky surface: soft frosting, freshly piped icing or melted chocolate.
- Decorate in small batches so the surface doesn’t set before the sprinkles go on.
- Check labels for edibility, allergens and whether a mix is suitable for baking.
- Let decorations set fully before packing, and store leftover sprinkles somewhere cool and dry.
Choose a Sprinkle Mix That Fits Your Treat
Choose your mix by its colors, the size of its pieces and where those pieces will sit on each treat.
Pick a palette. Classic red, green and white pairs well with chocolate, vanilla and green frosting, while white, pale blue and silver suits dark chocolate bark and pale frosting. Using one palette helps a sugar cookie, a frosted brownie and a cupcake look like a set, even when their decorating patterns differ.
Look at the pieces. Holiday blends often combine several types, such as jimmies, nonpareils, sugar pearls and quins, in a single mix. Jimmies are short rods, nonpareils are tiny balls, sugar pearls are larger spheres and quins are flat shapes such as stars or trees. Small pieces suit borders and light scattering, while larger ones can be placed individually as ornaments.
Check the label. Not every sparkly decoration is meant to be eaten. The FDA’s guidance for home bakers notes that most edible glitters and dusts say “edible” on the label, distinguishing them from decorative-only materials, so check each product along with its ingredient and allergen information.
Give Sprinkles a Surface They Can Stick To
Loose sprinkles won’t stay on a bare cookie or cooled brownie without something to hold them. Frosting, icing and melted chocolate all work, but each needs slightly different timing.
Soft frosting. Homemade or store-bought frosting both work. Spread a layer, add sprinkles while it’s still soft and tacky, and press larger pieces in lightly so they don’t roll off.
Piped icing. Royal icing dries quickly when exposed to air, so add sprinkles straight after piping. Pipe a small area, decorate it, then move on rather than piping a whole tray first.
Melted chocolate. Add sprinkles before the chocolate sets. Melt it according to the product’s instructions, and have the sprinkles open and within reach before you start dipping or spreading.
| Surface | Best for | When to add sprinkles |
| Soft frosting | Spread tops, borders, piped swirls | While the frosting is soft and tacky |
| Piped icing | Outlines, stripes, small dots | Straight after piping, before a dry skin forms |
| Melted chocolate | Dipped edges, bark, drizzle | While the chocolate is still fluid |
Decorate a test treat before committing the batch. If sprinkles bounce off, the surface has probably set, so add a fresh dab of frosting or re-dip the edge. Use mixed sprinkles after baking unless the label says they’re oven-safe, since some shaped pieces can melt in the oven.
Decorate Cookies With Borders, Stripes and Dipped Edges
A plain cookie makes borders and stripes easy to see. Work over a lined baking sheet so loose sprinkles are easy to collect, and let any frozen cookies thaw completely to room temperature first.
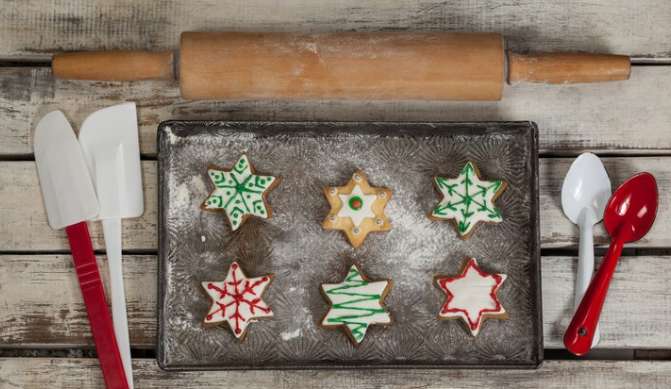
A frosted sprinkle border. Spread a thin, even layer of frosting to the edge of a cooled cookie. While it’s soft, pinch sprinkles along the rim or gently roll the frosted edge through a shallow dish of sprinkles. Leave the center plain or add a single sugar pearl.
A narrow icing stripe. Pipe a line of icing across a plain cookie and add sprinkles immediately, then tip the cookie so the excess falls away. A diagonal stripe gives a simple pattern, while parallel stripes can look like ribbon.
A chocolate-coated edge. Dip one edge of a cooled cookie in melted chocolate, letting the excess drip back into the bowl. Add sprinkles before it sets, then lay the cookie flat on parchment with space around it.
If you’d rather not mix and match colors yourself, a ready-made Christmas sprinkle mix keeps the palette consistent across every treat. Foliay’s collection offers a range of pre-designed holiday blends made from food-grade materials, suited to cookies, cupcakes and brownies alike.
Turn Cupcakes Into Wreaths and Christmas Trees
Cupcake frosting gives you room for larger sprinkle pieces. Green frosting forms the shape, while the sprinkles add the other colors from your palette.
Sprinkle wreaths. Use a star tip to pipe green buttercream in a ring, which gives a textured, leafy look. Place larger pearls or quins around it like ornaments, scatter small nonpareils between them and keep the center open so the wreath shape shows.
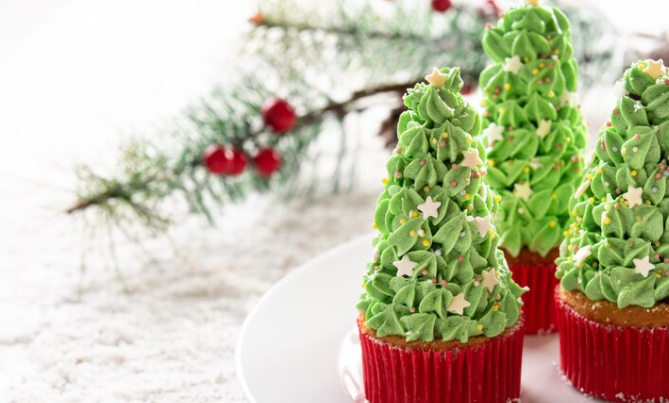
Simple tree swirls. Pipe a tall, tapered green swirl, set a star-shaped sprinkle on top while the frosting is soft and add smaller pieces along the ridges. If your frosting slumps, a lower, wider swirl still reads as a tree.
No piping bag needed. Spread frosting over the cupcake with the back of a spoon, doming it slightly. Arrange a ring of sprinkles around the edge, then add one larger decoration in the center or leave it plain.
Make Brownie Trees With Piped Garlands
A slab of brownies gives you a whole batch to decorate with one repeating pattern. Start with a completely cooled slab so the pieces hold their shape and don’t soften the frosting.
Cut the trees. Cut the slab into strips, then cut each strip on alternating diagonals to make triangles. Your yield depends on the pan and recipe you use.
Pipe with a food storage bag. Fill a bag no more than halfway, twist the top closed and snip a small corner. Test the line on parchment first so you can adjust the opening before you start decorating.
Add a zigzag garland. Starting near the top point, pipe a back-and-forth line that widens as it moves down. While the frosting is soft, press larger pieces on as ornaments and scatter smaller ones along the line.
Try frosted squares. If you’d rather skip cutting triangles, frost square brownies and add a sprinkle border or a light scatter. Follow your brownie recipe for baking temperature, pan size and cooling time.
Finish Chocolate Bark With a Coordinated Sprinkle Pattern
Bark adds a no-bake option to the tray. Follow your chosen chocolate or coating instructions for the base, then spread the melted chocolate in an even layer on a parchment-lined sheet pan.
Decide the pattern first. Keep the open mix within reach and choose your design before spreading, since the chocolate won’t wait while you pick pieces.
Scattered accents. Space larger pieces across the surface first, then scatter smaller ones lightly between them. Leave gaps where the chocolate shows through so the decorations stand out.
Loose bands. Sprinkle diagonal stripes across the slab, leaving bare chocolate between them. When you break the bark, each piece carries part of a band.
Leave the pan undisturbed until the chocolate has fully hardened, then lift the parchment and break the slab into pieces by hand. Setting time, shine and snap depend on the chocolate or coating you use.
Let the Decorations Set Before Packing
Packing too soon can smudge icing or dent chocolate coatings. Check each type of treat separately and choose containers that leave room around the decorations.
Check the finish. Let iced cookies dry completely before stacking. Test an inconspicuous spot, and if the icing still gives or smudges, wait a little longer.
Choose the container. Pack soft-frosted cupcakes and brownies in a single layer, with a lid tall enough to clear the frosting. Layer fully dried iced cookies with parchment between them, and keep chocolate-coated treats cool enough that they won’t soften in transit.
Store leftover sprinkles separately. Keep unused decorations sealed in their own packaging, in a cool, dry place away from direct sunlight and moisture, so they’re ready for the next batch.
Follow your recipes’ storage rules. Cream cheese and whipped frostings often need refrigeration, so use the storage temperature and time given in each recipe. If you’re hosting this season, building treat prep into your wider holiday entertaining prep keeps the final days calmer.
Conclusion
A coordinated holiday tray comes down to one palette, a tacky surface and good timing. Borders and stripes on cookies, wreaths on cupcakes, garlands on brownies and banded bark all use the same sprinkles in different ways.
Decorate a test piece first, work in small batches and let everything set before it goes in a box. The result looks planned, even if each treat took only a minute or two.
FAQ
Why won’t my sprinkles stick?
The surface has usually set. Sprinkles need soft frosting, freshly piped icing or still-fluid chocolate, so add a fresh dab of frosting or re-dip the edge and try again.
Can I bake holiday sprinkles into cookie dough?
Only if the label says they’re suitable for baking. Some shaped pieces can melt or bleed color in the oven, so most mixed blends are best added after baking.
Are all sparkly decorations edible?
No. Check that the label says “edible”, and read the ingredient and allergen information on each package before using it.
How should I store leftover sprinkles?
Keep them sealed in their own packaging in a cool, dry place away from direct sunlight and moisture, separate from finished desserts.
Discover more from The Cameron Journal
Subscribe to get the latest posts sent to your email.