When mold appears, it’s rarely just a surface issue. What starts as a few dark patches on a wall or ceiling can spread deep into materials and even compromise the structure of a home. Mold doesn’t just damage property; it affects indoor air quality and can make a space unhealthy to live in. Proper remediation takes more than a quick cleaning job—it requires identifying the root cause, removing the contamination, and ensuring conditions don’t allow mold to return. These are the same fundamentals discussed on the website of risk free serv water damage repair san diego, which outlines a complete and professional approach to mold recovery.
Understanding What Mold Really Is
Mold is a type of fungus that thrives in damp, warm, and poorly ventilated environments. It spreads through microscopic spores that travel through the air, waiting for a humid surface to settle on. While mold naturally exists in most environments, it becomes a problem when indoor moisture levels rise and surfaces remain damp long enough for colonies to form.Many people mistakenly believe that wiping away visible mold solves the issue. However, the visible growth is only part of the problem. Behind walls, under flooring, and within insulation, hidden colonies can continue to grow and release spores into the air. This is why professional assessment and thorough remediation are so critical. When dealing with extensive or hidden mold, it’s essential to seek expert help to ensure complete and safe mold damage remediation, preventing further health risks and structural issues.
Why Mold Damage Demands More Than Cleaning
Water intrusion is usually the trigger for mold outbreaks. It might come from a leaking pipe, roof damage, condensation, or flooding. Once mold begins to feed on damp organic materials like wood, drywall, or carpet, the damage escalates quickly. These materials not only lose their structural integrity but also become difficult to fully disinfect.
Simply spraying a cleaner over the surface doesn’t reach the embedded mold roots. What’s more, using the wrong products can make things worse by dispersing spores further into the air. That’s why any comprehensive recovery effort should involve containment, air filtration, and material removal as part of a larger moisture and mold cleanup plan.
Step One: Assessing the Extent of the Problem
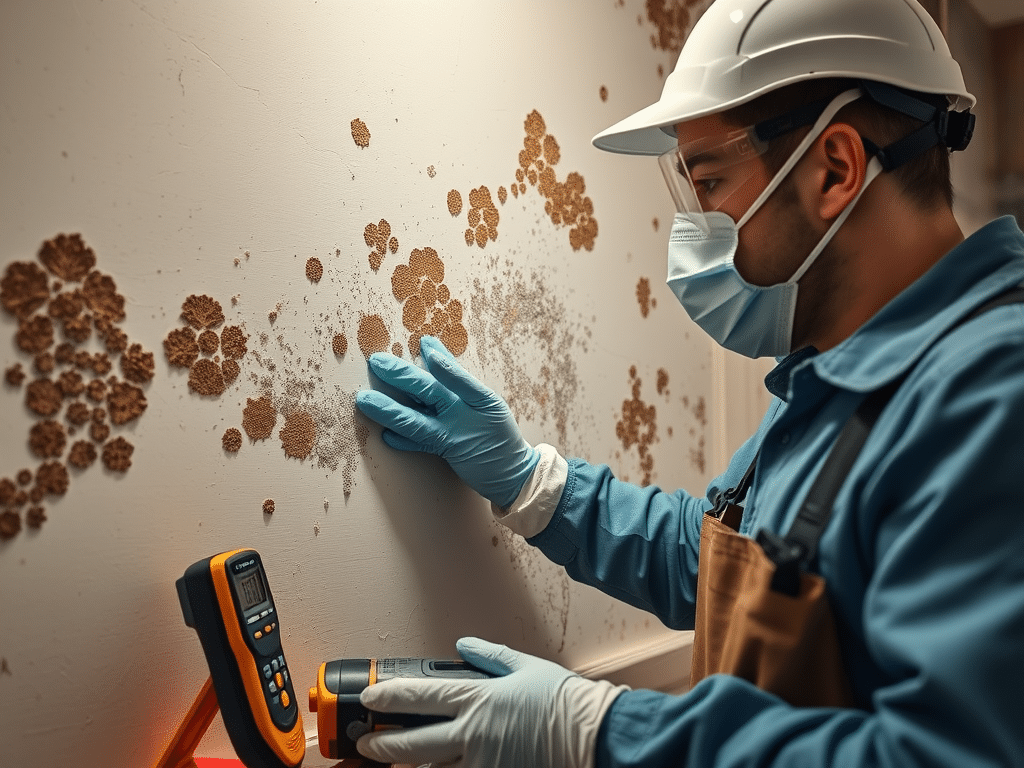
Before any actual cleanup begins, a full inspection is necessary. This process involves finding not only where the mold is visible but also where it’s hidden. Specialists use moisture meters, infrared cameras, and sometimes air quality tests to determine how far the contamination has spread.
The assessment also identifies the source of the moisture. Without resolving that first, any remediation work will eventually fail. Whether it’s a pipe behind the wall or poor ventilation in a bathroom, stopping the water source is the foundation for long-term success.
Step Two: Containment and Protection
Once the problem areas are identified, the next task is to prevent the mold from spreading. Professionals create containment zones using plastic sheeting and sealing tape to separate contaminated rooms from the rest of the house. They also use HEPA-filtered air scrubbers to trap airborne spores and keep them from circulating through the HVAC system.
This step is vital because mold spores are easily disturbed and can travel quickly. Proper containment ensures that remediation doesn’t cause a secondary contamination elsewhere.
Step Three: Safe Removal of Contaminated Materials
Porous materials are particularly vulnerable. Items like drywall, insulation, carpeting, and upholstery absorb moisture and mold spores deeply, which makes them nearly impossible to clean completely. These materials are typically removed and safely disposed of.
Nonporous materials, such as glass, metal, and certain plastics, can be cleaned using antimicrobial solutions. Every removed or treated surface is carefully checked to ensure no remaining mold is present before reconstruction begins.
Professionals also wear full protective gear during this stage—respirators, gloves, and coveralls—to prevent exposure to spores and chemicals. Safety is a priority not only for the workers but for anyone living in the property.
Step Four: Cleaning, Disinfection, and Drying
With contaminated materials removed, the next phase involves deep cleaning and drying. Industrial-grade air movers and dehumidifiers are used to bring moisture levels back to normal. All remaining surfaces are cleaned with EPA-approved products designed to kill remaining spores without introducing harmful residues.
HEPA vacuuming plays a major role here. These vacuums capture even the smallest particles that traditional vacuums can’t. The result is a clean and dry environment that no longer supports fungal growth. However, drying isn’t just about speed—it’s about precision. Materials must dry evenly to avoid warping or leaving pockets of hidden moisture.
Step Five: Repair and Restoration
After the property is cleared and fully dried, the restoration process can begin. This involves replacing any removed drywall, repainting walls, reinstalling flooring, or rebuilding damaged structures. The goal is to return the space to its pre-damage condition or even better.
Restoration should never start until moisture readings confirm that humidity and surface dampness are within safe limits. If rebuilding begins too early, trapped moisture can reignite the mold problem. A reliable remediation process always ends with thorough testing to ensure the space is safe and stable.
Step Six: Preventing Future Mold Growth
Repairing mold damage is only half the battle. Preventing it from returning requires changes to how the building manages moisture. Proper ventilation in bathrooms, kitchens, and basements is key. Dehumidifiers can help in naturally humid climates.
Homeowners should also monitor plumbing systems for slow leaks and maintain gutters and downspouts to direct water away from the foundation. Even something as small as leaving a window cracked after a shower can make a difference.
Regular inspections after water-related incidents—such as flooding or roof leaks—help identify problems early, before mold has a chance to develop. Prevention may seem simple, but it’s what keeps your home healthy and mold-free long after remediation is complete.
How to Know When to Call Professionals
While minor mold on bathroom tiles can often be handled with household cleaners, any growth larger than a few square feet or involving porous materials usually requires expert intervention. Mold can spread invisibly through walls and ceilings, and DIY cleaning efforts may disturb spores rather than remove them.
Professional teams bring specialized tools, protective gear, and proven processes to ensure the contamination is eliminated safely. They also provide documentation that may be necessary for insurance claims or property resale, confirming that the structure has been properly remediated.
Final Thoughts
Mold remediation isn’t just about cleaning—it’s about reclaiming a safe and livable space. It requires patience, precision, and commitment to addressing the root cause of moisture problems. With the right steps and professional care, it’s possible to restore your home and maintain a healthy indoor environment for the long term.
Discover more from The Cameron Journal
Subscribe to get the latest posts sent to your email.